
Why Use a Flash Drive to Reinstall Windows?
In the past, reinstalling an operating system was done using CDs or DVDs. Today, flash drives are much more popular because they are flexible, durable, and compatible with modern laptops that no longer have CD/DVD drives.
Using a flash drive also allows you to store your installation files for future use, making the process more efficient.
What is Rufus?
Rufus is a lightweight, free, and open-source application that helps you create a bootable USB drive. Developed by Pete Batard, Rufus has been widely used since 2011 and is known for its speed and reliability.
Rufus supports multiple languages (including Indonesian) and is compatible with Windows operating systems like Windows 7, 8, 10, and 11 on both 32-bit and 64-bit systems.
You can download Rufus from the official website: https://rufus.ie
Key Features of Rufus
Rufus can be used for:
- Creating bootable USB installation media from ISO files (Windows, Linux, UEFI, etc.)
- Working on systems without an operating system
- Flashing BIOS or firmware from DOS mode
- Running low-level utilities
How to Use Rufus to Make a Bootable Flash Drive
1. Prepare What You Need:
- A flash drive with at least 8 GB of storage (preferably USB 3.0)
- A Windows ISO file (e.g., Windows 10 or 11). Windows 11 Download Here!
- The Rufus application (installer or portable version)

2. Open Rufus
Plug in your flash drive and open the Rufus application. It will automatically detect your USB drive.
If not, click on “Show advanced drive properties” and check “List USB Hard Drives”.
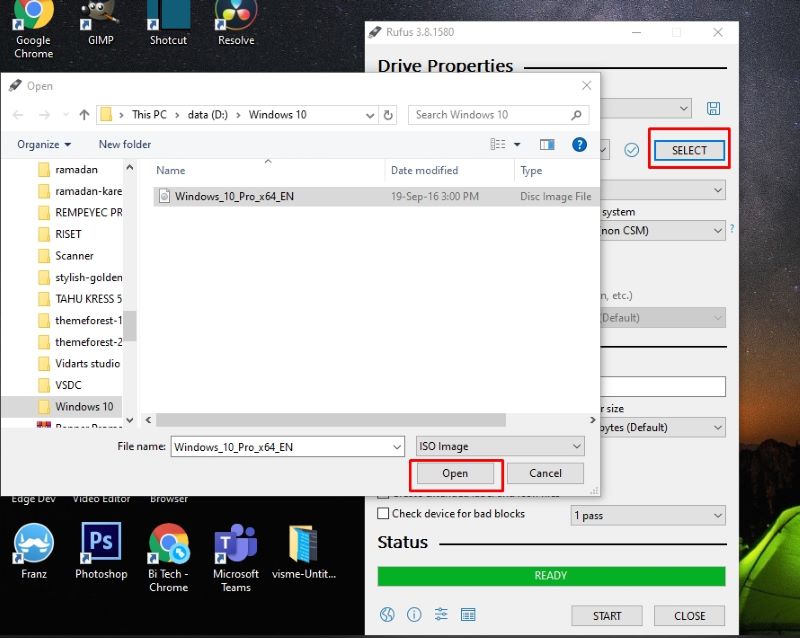
3. Select the ISO File
Click the “SELECT” button, find your Windows ISO file, and open it.
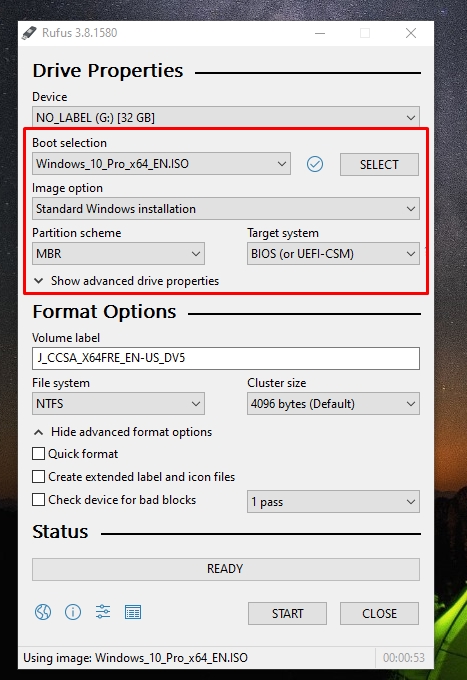
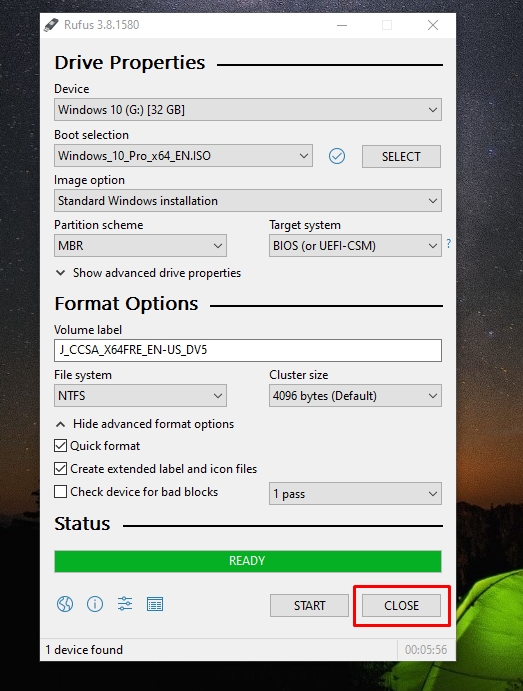
4. Configure Rufus Settings
Use the following settings:
- Partition Scheme: MBR
- Target System: BIOS (or UEFI-CSM)
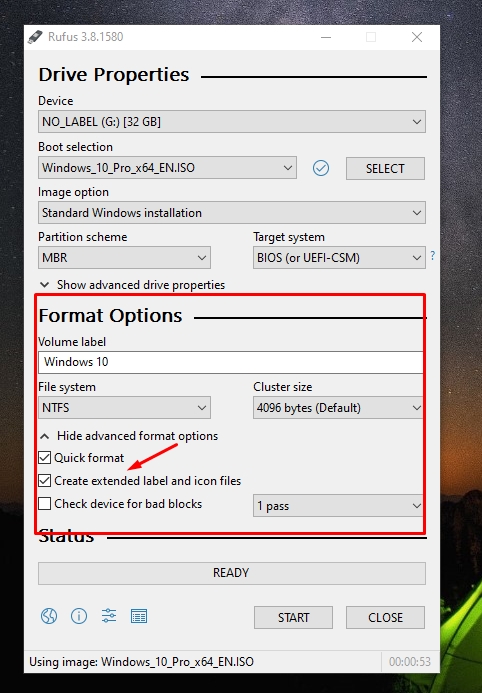
- File System: NTFS
- Check the boxes for “Quick Format” and “Create extended label and icon files”
You can also rename the volume label if you like.
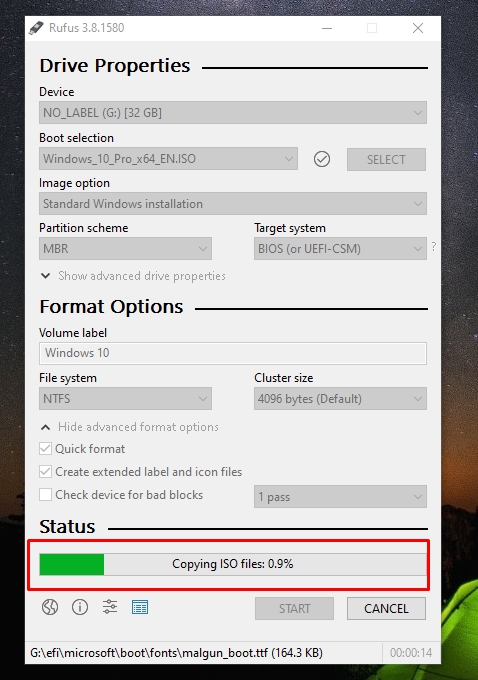
5. Start the Process
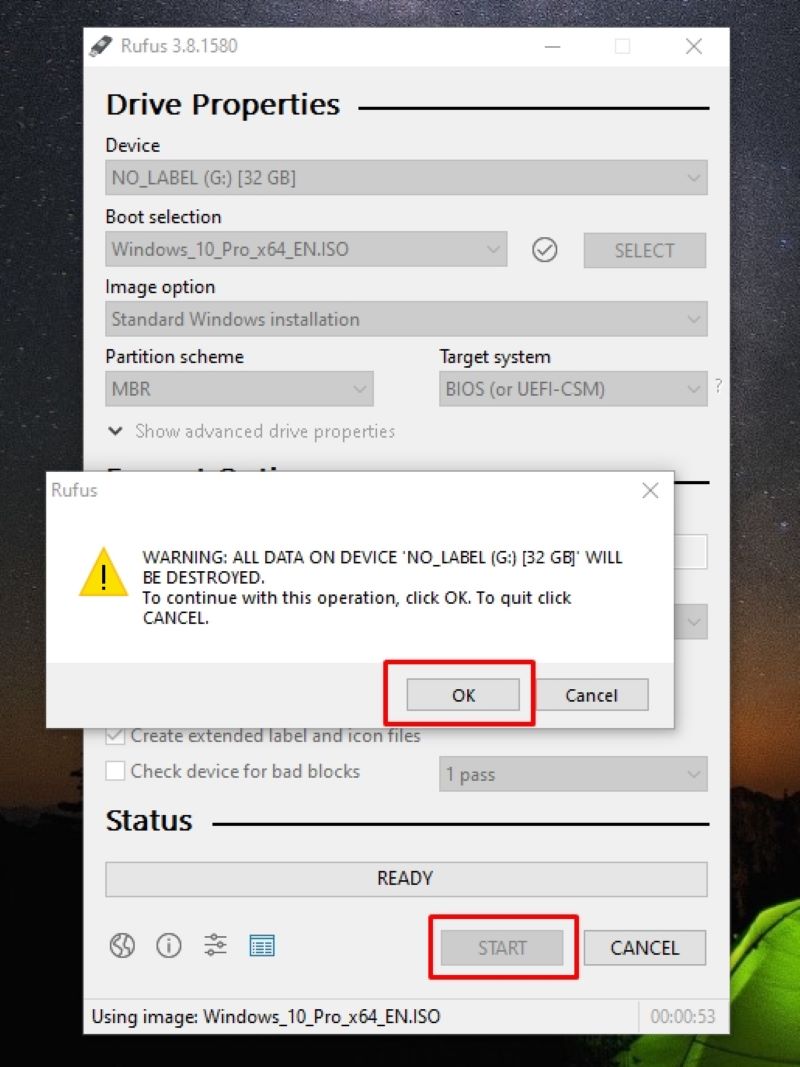
Before clicking “Start,” back up any important data from the flash drive as everything will be erased.
Once ready, click “Start.” Confirm the warning, and Rufus will begin making your flash drive bootable. The process typically takes 10 to 15 minutes depending on your flash drive speed and ISO size.
6. Set BIOS to Boot from USB
Once the flash drive is ready, restart your PC or laptop. Enter the BIOS settings and set your flash drive as the first boot option. Save and exit to begin the Windows installation process.
Final Words
Using Rufus to create a bootable flash drive is a fast, efficient way to reinstall Windows. This method is highly recommended for both beginners and experienced users. Rufus also supports creating bootable drives for other systems like Linux and macOS.
We hope this guide helps you successfully set up your bootable USB and reinstall your operating system smoothly. Good luck!